Hosting a Text Classification AI on SageMaker
October 19, 2023With the rapid growth of popularity and use cases of machine learning models, services are needed to simplify the process of training and deploying these models. AWS SageMaker helps by delivering a comprehensive and accessible set of tools and resources. It provides a platform for data preparation, model development, training, and deployment. SageMaker also integrates well with other AWS services, making it easier to build larger systems using machine learning.
Demo Implementation
Our Demo Implementation uses a Text Classification Model and is based on another project written in Python by Philipp Schmid, that was translated into TypeScript by Karina Serres. An important thing to mention is, that this implementation is built for demonstrational purposes only, which is why e.g. the principle of least privilege is not adhered to.
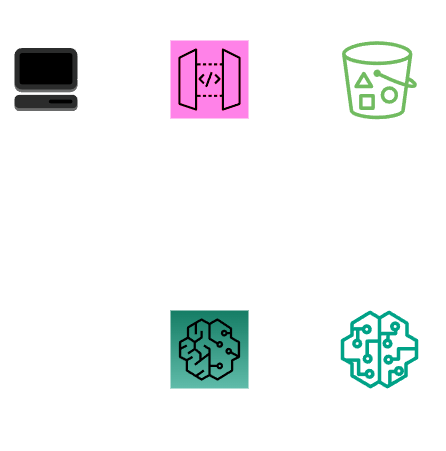
We use an ApiGateway which handles requests and sends them to a SageMaker Endpoint, that forwards them to the model. The model itself is stored in an S3-Bucket.

Important information is stored in a config.ts file.
export const huggingfaceAccountInfo = { region: 'eu-central-1', account: '763104351884' }
We define our resources within the Stack HuggingfaceAiDeploymentStack using CDK.
import {
  CfnOutput,
  Stack,
  StackProps,
  RemovalPolicy
} from 'aws-cdk-lib';
import {
  aws_iam as iam,
  aws_s3 as s3,
  aws_s3_deployment as s3deploy,
  aws_ecr as ecr,
  aws_apigateway as apigw,
  aws_logs as logs
} from 'aws-cdk-lib';
import { Construct } from 'constructs';
import * as config from './config';
import * as sagemaker from '@aws-cdk/aws-sagemaker-alpha';

export class HuggingfaceAiDeploymentStack extends Stack {
  constructor(scope: Construct, id: string, props?: StackProps) {
    super(scope, id, props);
    /*
    ...
    */

  };
};
First, we need to create an IAM-Role for SageMaker that we will later attach permissions to so that it can access the S3-Bucket and ECR-Repository.
    const sagemakerRole = new iam.Role(this, 'SagemakerRole', {
      assumedBy: new iam.ServicePrincipal('sagemaker.amazonaws.com'),
    });
    sagemakerRole.addManagedPolicy(iam.ManagedPolicy.fromAwsManagedPolicyName('AmazonSageMakerFullAccess'));

    const sagemakerPolicy = new iam.Policy(this, 'SagemakerPolicy', {
      statements: [new iam.PolicyStatement({
        effect: iam.Effect.ALLOW,
        actions: [
          "cloudwatch:PutMetricData",
          "cloudwatch:GetMetricData",
          "cloudwatch:GetMetricStatistics",
          "cloudwatch:ListMetrics",
        ],
        resources: ['*'],
      })],
    });
    sagemakerRole.attachInlinePolicy(sagemakerPolicy);
Then we need to define the S3-Bucket that contains the model. To avoid having to upload the files in the AWS-Console by hand, we use S3-Deployment and upload the zip of the model using our CDK code. However, to make S3-Deployment possible, the zip of the model must be in the project files. We put the model data in a ./modeldata folder. We also grant our sagemakerRole the ability to read and write in the bucket.
    const s3Bucket = new s3.Bucket(this, 'ModelBucket', {
      autoDeleteObjects: true,
      removalPolicy: RemovalPolicy.DESTROY,
    });
    s3Bucket.grantReadWrite(sagemakerRole)

    const bucketDeployment = new s3deploy.BucketDeployment(this, 'DeployModel', {
      sources: [s3deploy.Source.asset('./modeldata')],
      destinationBucket: s3Bucket,
    });
We also need to define the ECR-Repository that stores the image of the model.
    const repositoryName = 'huggingface-pytorch-inference'
    const repositoryArn = `arn:aws:ecr:${config.huggingfaceAccountInfo.region}:${config.huggingfaceAccountInfo.account}:repository/${repositoryName}`
    const repository = ecr.Repository.fromRepositoryAttributes(this, 'HuggingFaceRepository', { repositoryArn, repositoryName });
    repository.grantRead(sagemakerRole)

    const image_tag = '1.13.1-transformers4.26.0-cpu-py39-ubuntu20.04'
    const image = sagemaker.ContainerImage.fromEcrRepository(repository, image_tag);
We now define the model by combining the previously defined sagemakerRole, the ECR-Repository and our S3-Bucket, using SageMaker.
    const model_name = 'distilbert-base-uncased-finetuned-sst-2-english';
    const modelData = sagemaker.ModelData.fromBucket(s3Bucket, `${model_name}.tar.gz`);

    const model = new sagemaker.Model(this, 'PrimaryContainerModel', {
      containers: [
        {
          image: image,
          modelData: modelData,
          environment: {
            HF_TASK: 'text-classification',
            MMS_DEFAULT_WORKERS_PER_MODEL: '1',
            HF_MODEL_ID: model_name,
          },
        }
      ],
      role: sagemakerRole
    });
    model.node.addDependency(bucketDeployment);
However, in order to reach the model, we need an Endpoint, which we can also define using SageMaker.
    const endpointConfig = new sagemaker.EndpointConfig(this, 'EndpointConfig', {
      instanceProductionVariants: [
        {
          model: model,
          variantName: 'HuggingFaceModel',
          initialVariantWeight: 1,
        }
      ]
    });

    const endpoint = new sagemaker.Endpoint(this, 'Endpoint', { endpointConfig });
To make this Endpoint accessible, we need an ApiGateway. For this we first define a role that allows the ApiGateway to invoke the endpoint.
    const apigwRole = new iam.Role(this, 'ApiGatewayRole', {
      assumedBy: new iam.ServicePrincipal('apigateway.amazonaws.com'),
    });

    const apigwPolicy = new iam.Policy(this, 'ApiGatewayPolicy', {
      statements: [new iam.PolicyStatement({
        effect: iam.Effect.ALLOW,
        actions: [
          "sagemaker:InvokeEndpoint",
        ],
        resources: [endpoint.endpointArn]
      })],
    });
    apigwRole.attachInlinePolicy(apigwPolicy);
With this role defined, the ApiGateway can now be created.
    const api = new apigw.RestApi(this, "ApiGateway", {
      deployOptions: {
        stageName: "prod",
        tracingEnabled: true,
        metricsEnabled: true,
      },
      defaultCorsPreflightOptions: {
        allowOrigins: apigw.Cors.ALL_ORIGINS,
        allowMethods: [ 'POST' ],
        allowHeaders: apigw.Cors.DEFAULT_HEADERS,
      },
    });

    const queue = api.root.addResource(model_name);
    queue.addMethod(
      "POST",
      new apigw.AwsIntegration({
        service: "runtime.sagemaker",
        path: `endpoints/${endpoint.endpointName}/invocations`,
        integrationHttpMethod: "POST",
        options: {
          credentialsRole: apigwRole,
          integrationResponses: [
            {
              statusCode: "200",
            },
          ],
        },
      }),
      { methodResponses: [{ statusCode: "200" }] }
    );

    new CfnOutput(this, 'ApgwEndpoint', { value: `${api.url}/${model_name}` });
The last thing we do is define a Log Group and give SageMaker permission to write in it.
    const sageMakerLogGroup = new logs.LogGroup(this, 'SageMakerLogGroup', {
      removalPolicy: RemovalPolicy.DESTROY,
    });
    sageMakerLogGroup.grantWrite(new iam.ServicePrincipal("sagemaker.amazonaws.com"));
Deployment
After this code has been implemented and the model files are in ./modeldata, you can deploy the model, simply by using cdk deploy.
You can test this model by using this curl command.
curl --request POST \
     --url {apigw-url} \
     --header 'Content-Type: application/json' \
     --data '{"inputs": "Inference with hugging face models and Sagemaker is easy!" }'
Conclusion
SageMaker is a useful resource for various tasks related to machine learning. It offers a wide variety of tools and as shown in this use case, works well with other AWS-Services. It’s now up to you, to try out other features of SageMaker, like SageMaker Notebooks or SageMaker Ground Truth.
The full project can be found on GitHub.

